You can easily use the built-in flash and adjust the flash power on your Rebel SL3 (also known as 250D) by using the flash exposure compensation settings.
This is important to know because the Rebel SL3 is a crop sensor camera meaning it’s not as good in low light compared to full frame cameras.
It also comes in handy when there’s just not enough light and your SL3 can’t seem to focus.
There’s also some important tips you should be aware of when using built-in flash (don’t worry I’ll go through them).
Table of Contents
How To Activate The Built In Flash On Rebel SL3
First things first, let’s tell you how to activate the built in flash.
If you already know how to do this then feel free to move onto the next section where I tell you how to adjust the power of your flash.
Some other Canon EOS cameras have a flash button that will pop your flash up, but the Rebel SL3 doesn’t have this.
To pop the flash up, you need to lift it up with your fingers.
If you’re not sure where it is, it’s resting just above where it says Canon on the front/top of your Rebel SL3.
Ok, now that your flash is ready to use lets see how to use it.
When you press the shutter button halfway make sure you can see the flash icon in the viewfinder.
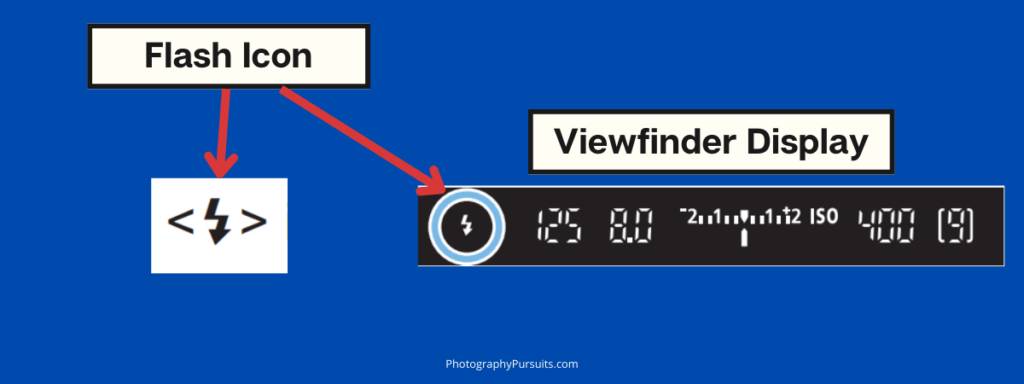
Now fully press the shutter button down and the flash should fire when the picture is taken.
Tips For Shooting With Built-in Flash
If you find that the bottom of your picture looks dark then it’s probably because the flash has been obstructed. To get around this, try one of the following:
- Detach the lens hood if you are using one.
The lens hood can obstruct the flash light from reaching the bottom part of your exposure.
- Step away from the subject.
If you’re too close to the subject then the flash doesn’t have a chance to disperse enough and reach the bottom of your frame. This is why it can look dark in the bottom of your pictures.
Rebel SL3
One of the most popular entry-level crop-sensor Canon DSLRs you can get.
How to Increase Flash Power on Canon Rebel SL3?
Sometimes the flash is just a bit too weak (or strong) and you can adjust the power with ‘Flash Exposure Compensation’.
The flash exposure compensation settings let you increase or decrease flash exposure by up to 2 stops.
💡 Remember that 1 stop higher means doubling the amount of light and 1 stop lower means halving the amount of light.
You can adjust the flash exposure compensation in increments of ⅓ of a stop for greater control.
Here’s how you can adjust the flash exposure compensation on your Rebel SL3:
- Press the ‘Menu’ button on your Rebel SL3.
- Then go to your ‘Shooting settings’ menu (this is the red menu with a camera icon).
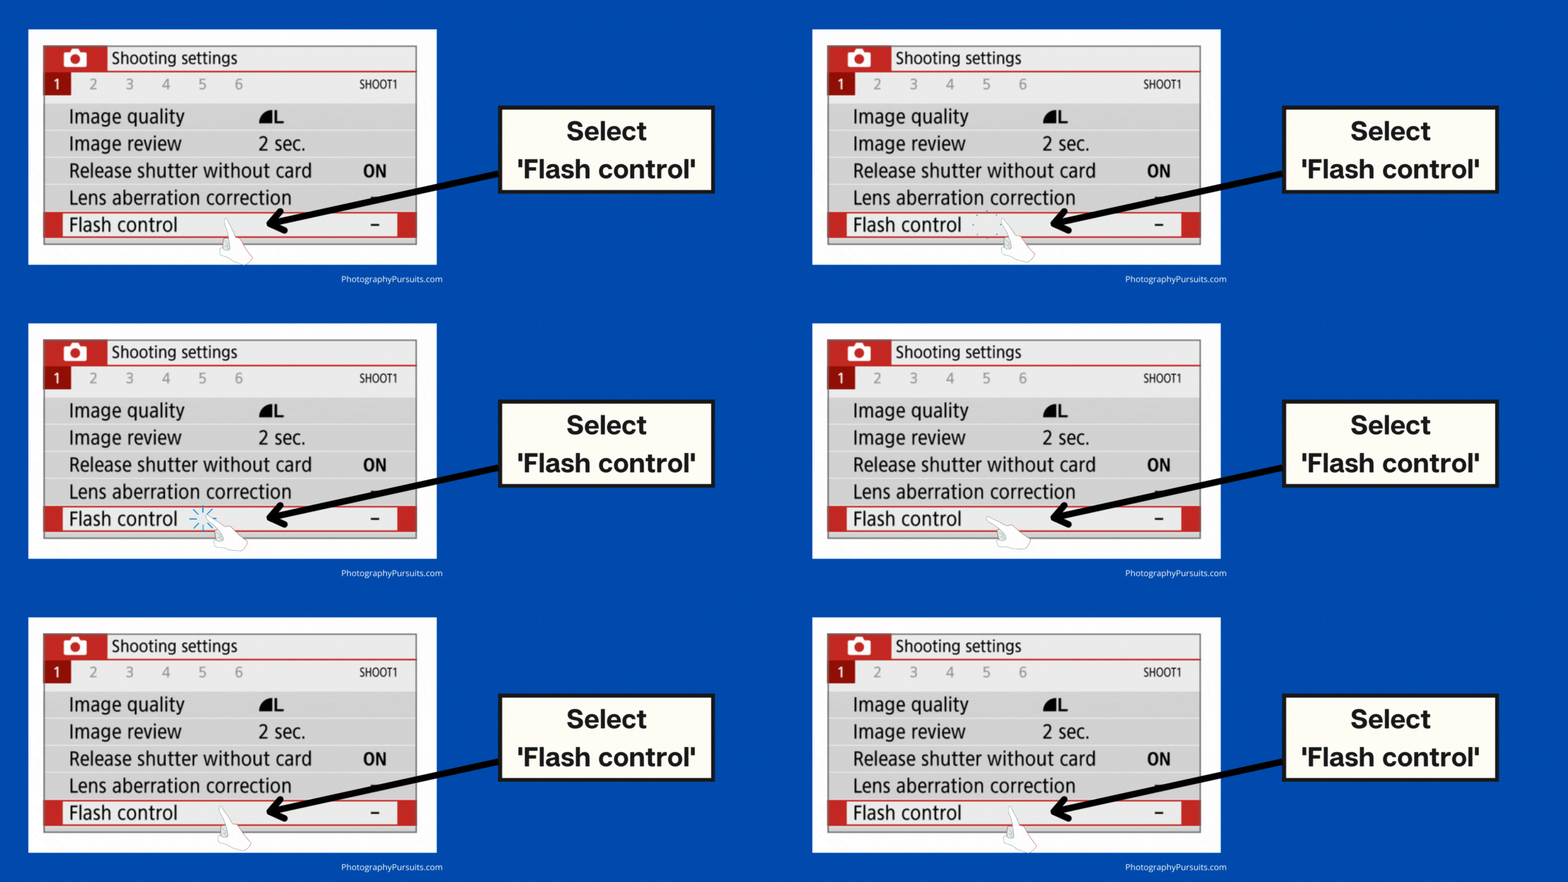
- Under tab 1 of your ‘Shooting settings’ menu, (you should see ‘Shoot1’ in the top right corner) find the ‘Flash control’ option.
- Select the ‘Flash control’ option.
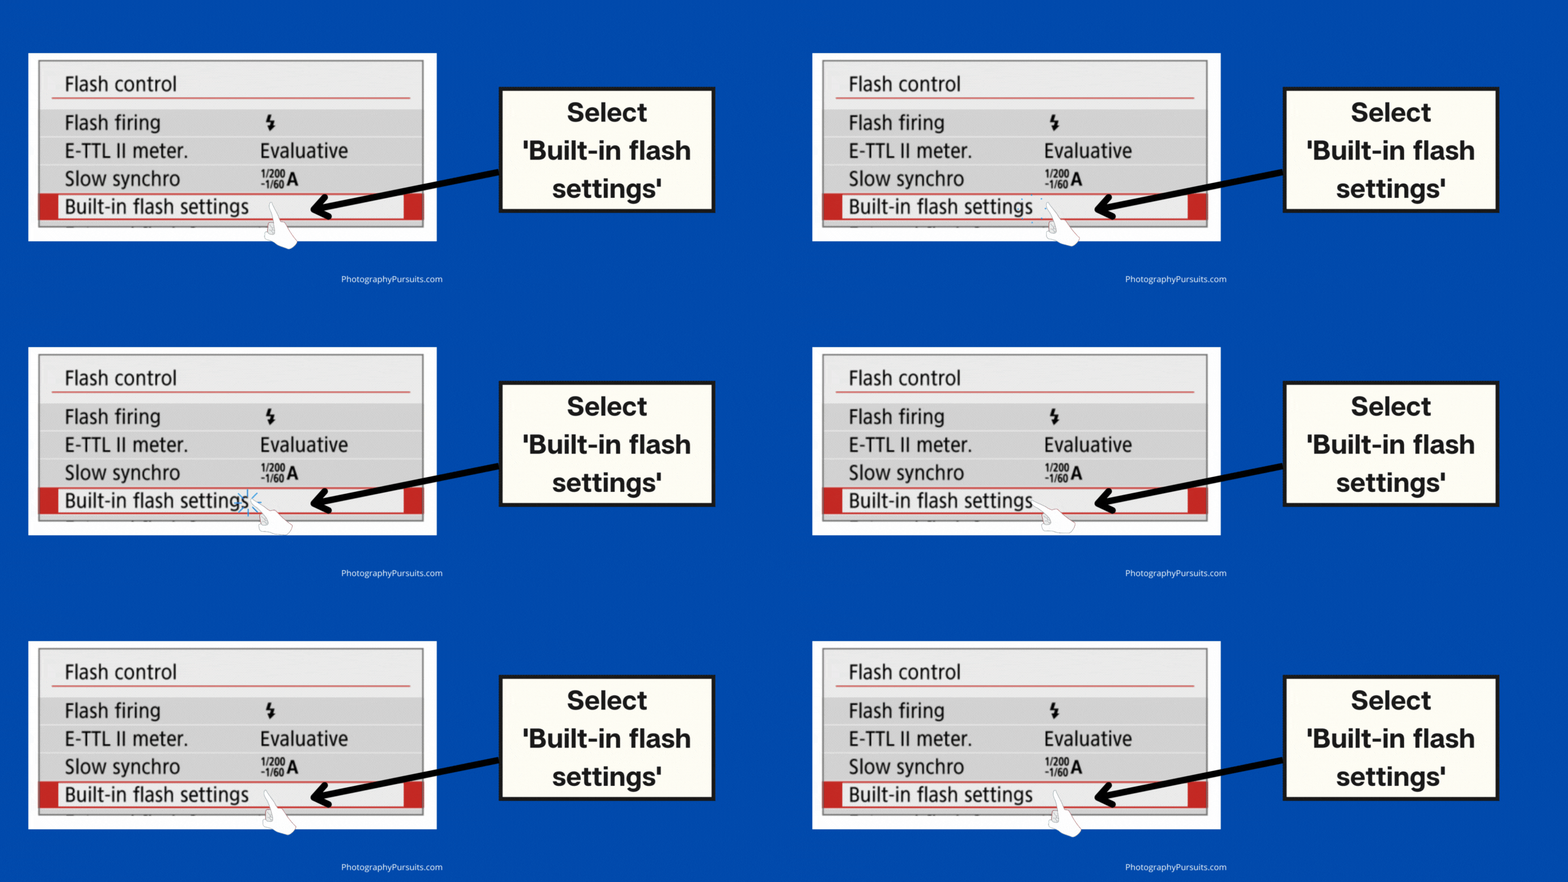
- Under the flash control option you should find an option called ‘Built-in flash settings’. Select this option.
- You should now see an option called ‘exp.comp.’ which stands for exposure compensation. Select this option.
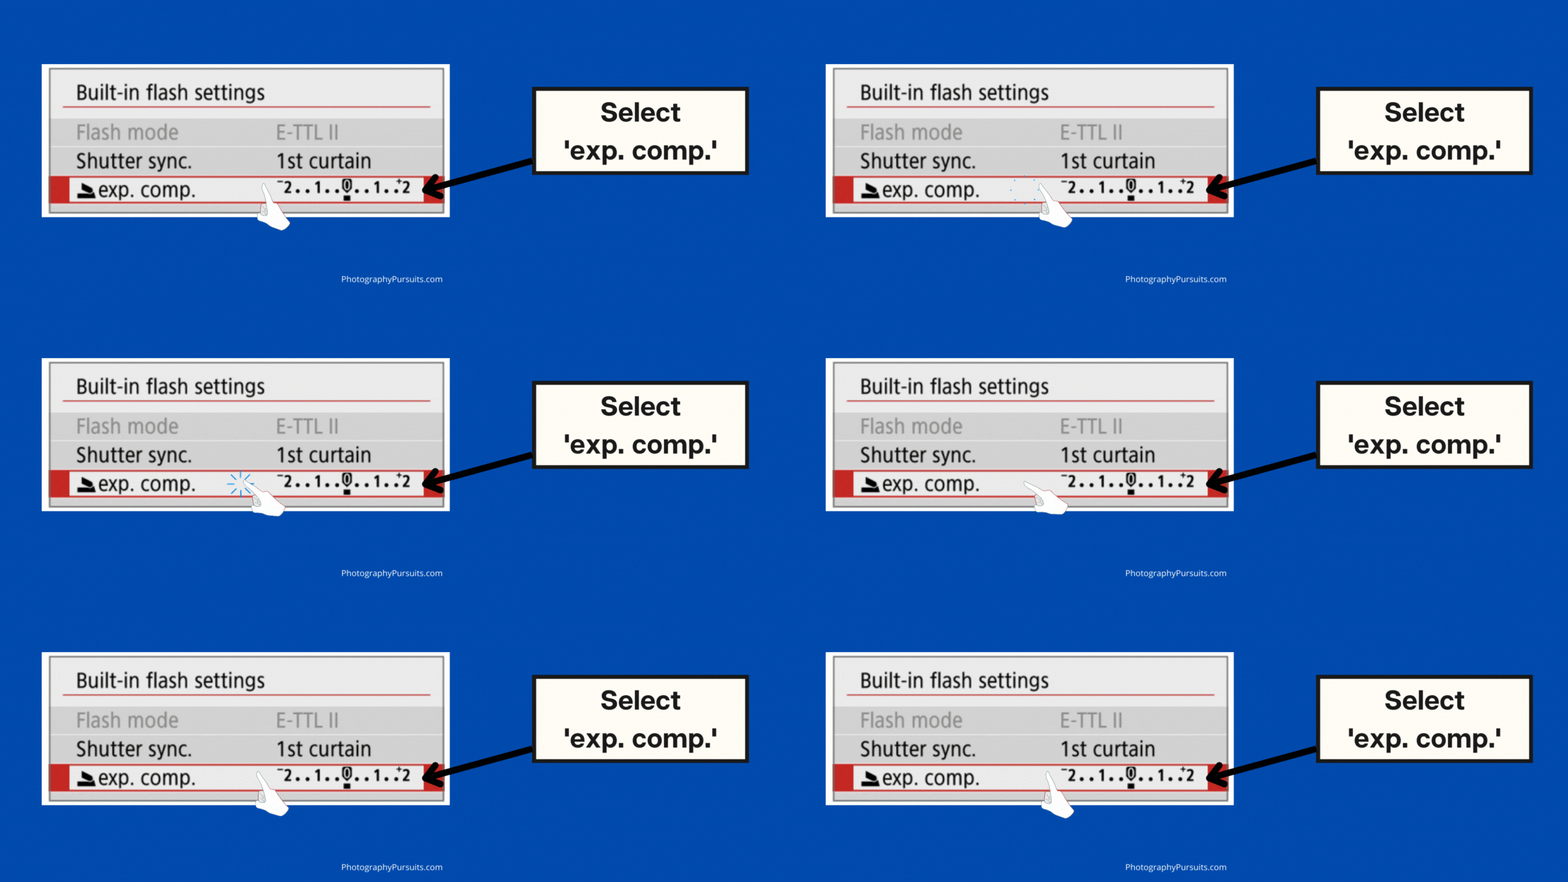
- This is where you can set the level of flash exposure compensation you want:
- If you want to increase the exposure (make it brighter) then move it to the right.
- If you want to decrease the exposure (make it darker) then move it to the left.
- Now when you press the shutter button halfway you’ll see an icon in the viewfinder which shows that the flash exposure compensation is active.
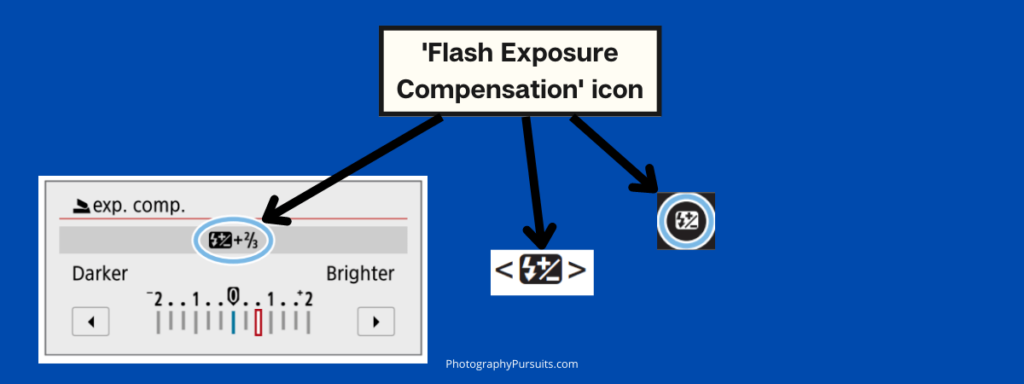
- When you’re done taking pictures the camera will still keep the flash exposure compensation settings that you’ve chosen.
Even if you turn the power off it will save the same setting, so if you want it to go back to default you need to set it back to zero.
Remember that this applies to using the built-in flash on the Rebel SL3.
If you’re using an external flash on the Rebel SL3 then the external flash will override any flash exposure compensation settings on the camera.
Note: There’s a setting called auto lighting optimizer in your camera that you should be aware of.
If this setting is enabled then your picture might look too bright even if you’ve set the flash exposure compensation to a low level.
You can go ahead and disable this setting if you’re having issues with pictures being too bright.
You can do this by:
– Going to shooting settings (red menu with camera icon), tab 3, and then find Auto Lighting Optimizer.
The Flash Is Still Not Strong Enough
If you’ve set your flash exposure compensation setting to the highest level, but you still need more light, then the built-in flash on your Rebel SL3 is probably too weak for your needs.
Built-in flashes are meant to be handy but they can’t replace an external flash in all scenarios.
External flashes are much stronger so photographers rely on these more.
This is because in general, external flashes are stronger and give you way more reach compared to built in flashes.
For example, where a built-in flash could reach 2-5 meters, an external flash could reach over 10-15 meters. Of course it depends on the built-in flash and external flash being used.
If you are going to get an external flash just make sure you’ve done your research and made sure it’s compatible with your Rebel SL3.
Not all external flashes will be compatible with the SL3.
Further Resources:
If you want to find out more about the Canon Rebel SL3 settings and menus then check out the helpful video below.
Related Reading:
Built-in flash isn’t the only useful thing about the Rebel SL3. There’s also a built-in timelapse feature on the Rebel SL3.

